すべてのガイドに戻る
2026-01-12
AIフェイススワップビデオ
フェイススワップはクリーンな入力で最も効果的:明確なソースビデオとシャープな顔画像。角度を類似に保ち、重いぼかしを避ける。
クイックステップ
1分以内で完了できる簡単なチェックリスト。
- 1フェイススワップツールを開く。
- 2ソース動画をアップロード(変更したい動画)。
- 3明確な顔画像をアップロード(正面、良好な照明)。
- 4結果を生成して確認します。
- 5おかしく見える場合は、よりシャープな顔画像とよりクリーンなソースビデオを使用。
選択可能なツールオプション
モード:動画画像
- 動画は30秒に制限。
- アスペクト比の設定なし(ソースを維持)。
チュートリアル例(プロンプトと設定付き)
以下の各例は、このガイド用に事前選択されています(ランダムではありません)。
例 1
動画フェイススワップ(9:16)
face-swap
この例の使い方
- 1.ツールを開く。
- 2.以下の入力と設定に従ってください。
- 3.以下に示す入力ファイルをアップロード。
- 4.キーワード(または完全なプロンプト)を使用し、設定を選択。
- 5.生成し、必要に応じて調整(トリミング/照明/プロンプト)。
入力
Source
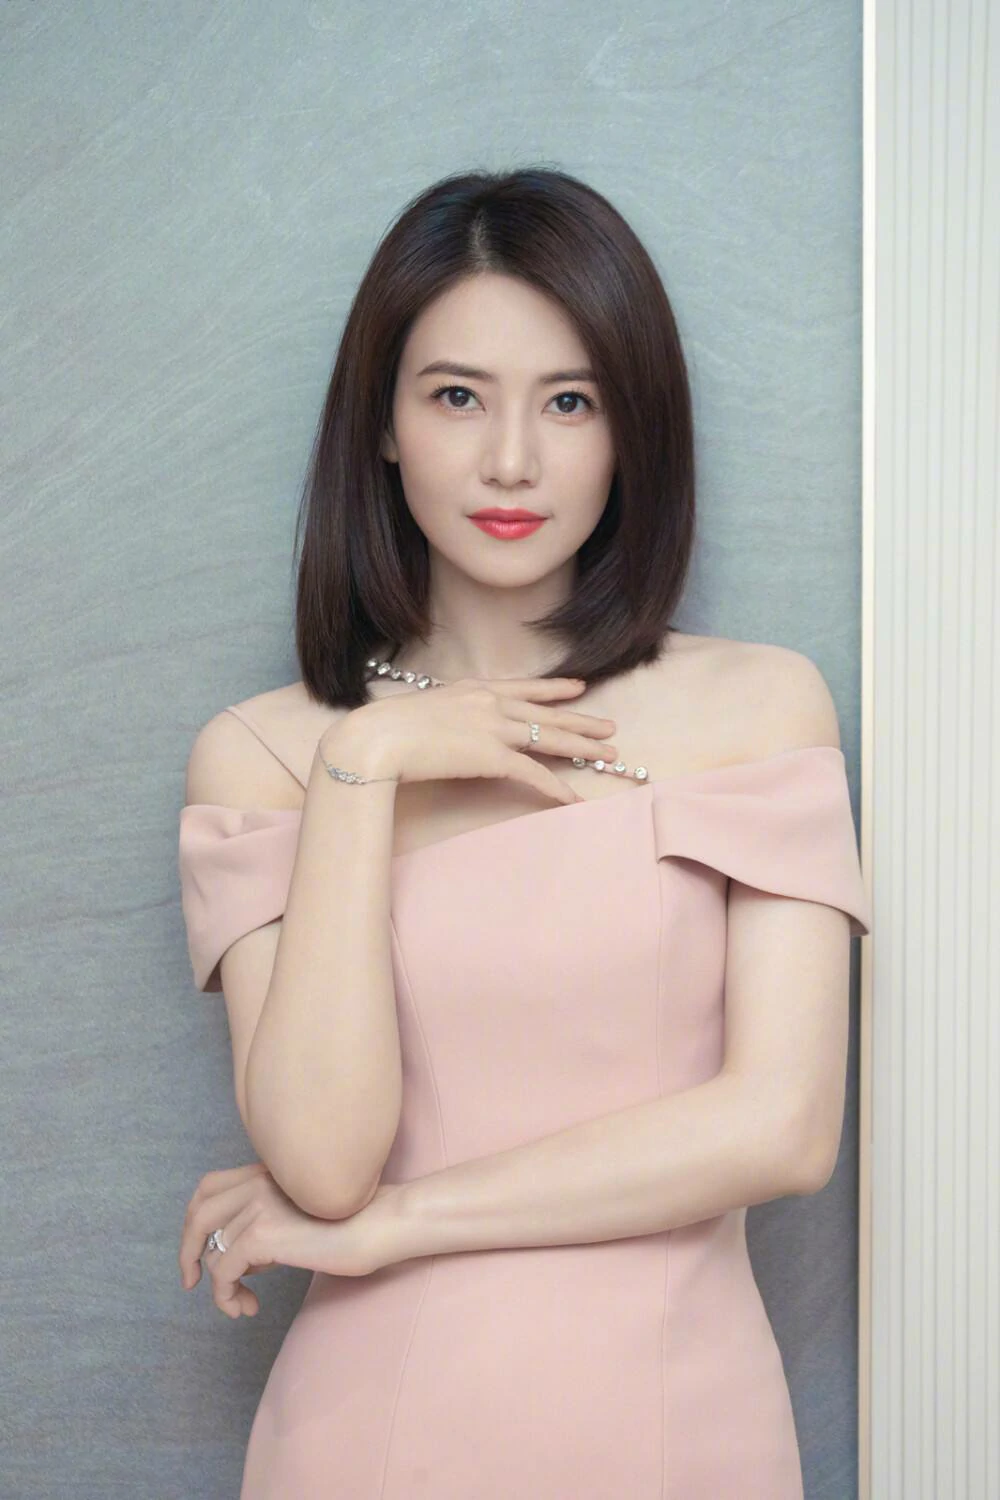
Face
設定(この例で使用)
アスペクト比
9:16
例 2
画像フェイススワップ(1:1)
face-swap
この例の使い方
- 1.ツールを開く。
- 2.以下の入力と設定に従ってください。
- 3.以下に示す入力ファイルをアップロード。
- 4.キーワード(または完全なプロンプト)を使用し、設定を選択。
- 5.生成し、必要に応じて調整(トリミング/照明/プロンプト)。
入力
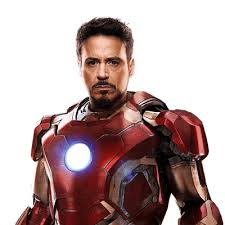
Target

Face
設定(この例で使用)
アスペクト比
1:1
ヒント
- ソースビデオと類似の角度/照明の顔画像を選択。
- モーションブラーと非常に低解像度の入力を避ける。
- アーティファクトが表示される場合は、ソースクリップを簡素化し、より短いセグメントを試す。
よくある質問
なぜ交換された顔が歪んで見えるのですか?▼
It’s usually caused by low-quality face images, extreme angles, or motion blur. Use a sharper face image and a cleaner clip.
画像でもフェイススワップできますか?▼
はい—多くのワークフローはビデオと画像の両方のスワップをサポートしています。まず最も簡単なケースから始める。
What’s the best aspect ratio?▼
ソースビデオと同じ比率を使用(垂直コンテンツは9:16)。
生成する準備はできましたか?
ツールを開いて、上記のプロンプト/設定を再利用してください。