모든 가이드로 돌아가기
2026-01-12
AI 얼굴 교체 영상
얼굴 교체는 깨끗한 입력으로 가장 잘 작동합니다: 선명한 소스 영상과 선명한 얼굴 이미지. 각도를 비슷하게 유지하고 심한 흐림을 피하세요.
빠른 단계
1분 이내에 완료할 수 있는 빠른 체크리스트.
- 1얼굴 교체 도구를 엽니다.
- 2소스 영상 업로드 (수정하려는 영상).
- 3선명한 얼굴 이미지 업로드 (정면, 좋은 조명).
- 4생성 및 결과 검토.
- 5이상해 보이면 더 선명한 얼굴 이미지와 더 깨끗한 소스 영상을 사용하세요.
선택 가능한 도구 옵션
모드:비디오이미지
- 비디오는 30초로 제한.
- 화면 비율 설정 없음 (소스 유지).
튜토리얼 예제(프롬프트 및 설정 포함)
아래의 각 예제는 이 가이드를 위해 미리 선택되었습니다(무작위 아님).
예제 1
영상 얼굴 교체 (9:16)
face-swap
이 예제 사용 방법
- 1.도구를 엽니다.
- 2.아래의 입력 및 설정을 따르세요.
- 3.아래에 표시된 입력 파일들을 업로드하세요.
- 4.키워드(또는 전체 프롬프트)를 사용하고 설정을 선택하세요.
- 5.생성하고 필요에 따라 반복하세요 (자르기/조명/프롬프트).
입력
Source
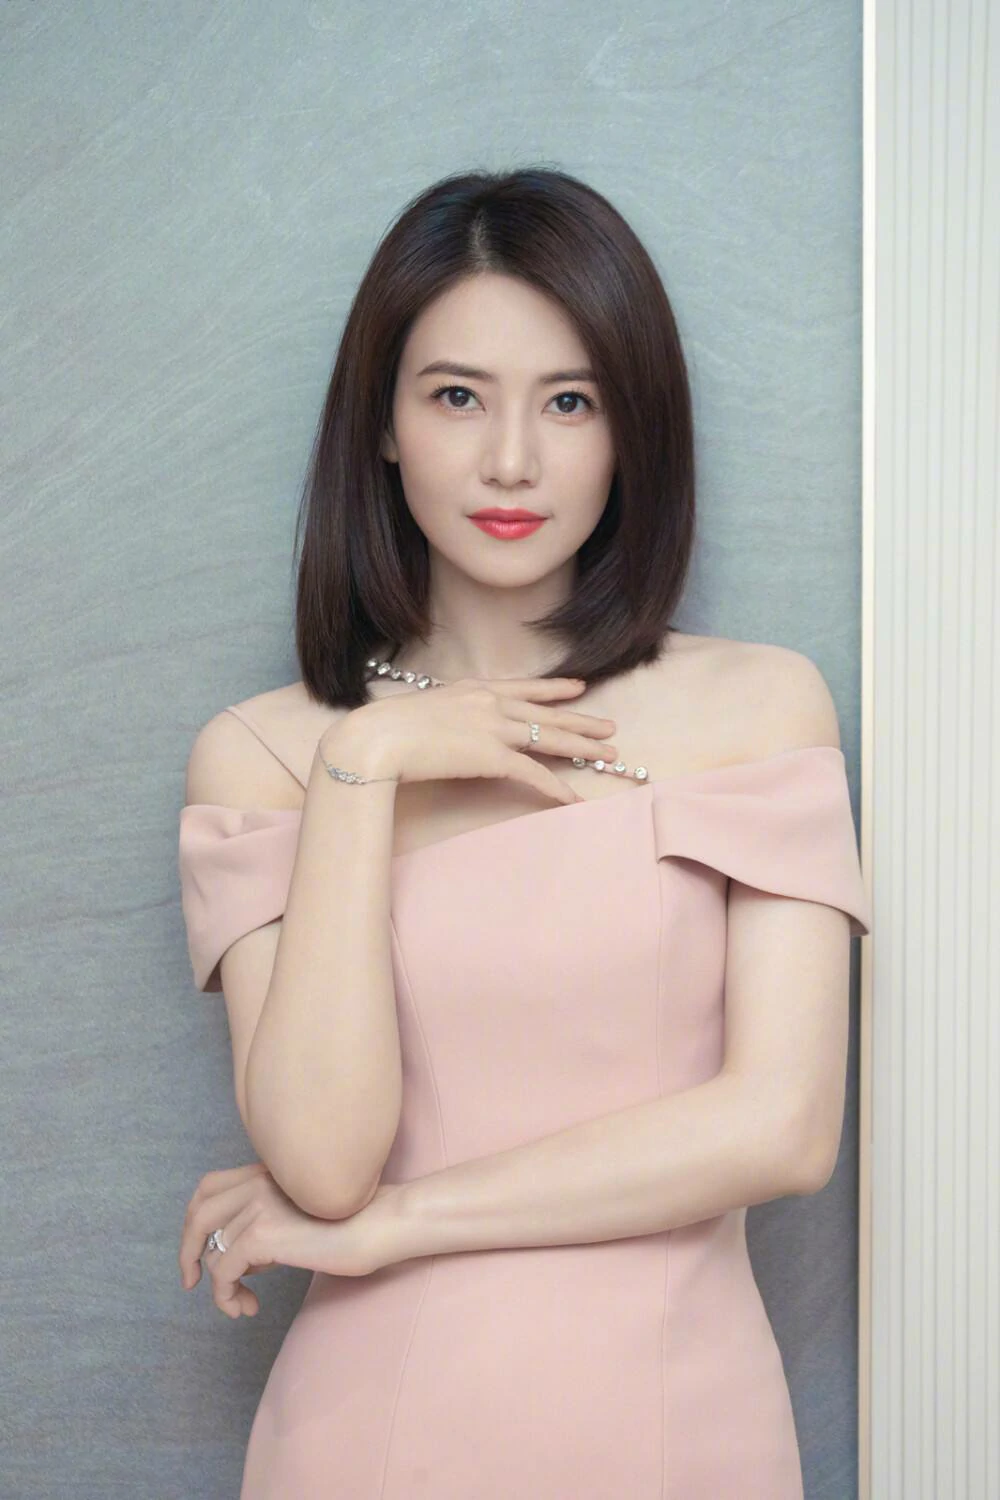
Face
설정 (이 예제에서 사용)
화면 비율
9:16
예제 2
이미지 얼굴 교체 (1:1)
face-swap
이 예제 사용 방법
- 1.도구를 엽니다.
- 2.아래의 입력 및 설정을 따르세요.
- 3.아래에 표시된 입력 파일들을 업로드하세요.
- 4.키워드(또는 전체 프롬프트)를 사용하고 설정을 선택하세요.
- 5.생성하고 필요에 따라 반복하세요 (자르기/조명/프롬프트).
입력
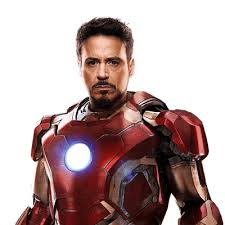
Target

Face
설정 (이 예제에서 사용)
화면 비율
1:1
팁
- 소스 영상과 비슷한 각도/조명의 얼굴 이미지 선택.
- 모션 블러와 매우 저해상도 입력을 피하세요.
- 아티팩트가 나타나면 소스 클립을 단순화하고 더 짧은 세그먼트를 시도하세요.
자주 묻는 질문
교체된 얼굴이 왜곡되어 보이는 이유는?▼
It’s usually caused by low-quality face images, extreme angles, or motion blur. Use a sharper face image and a cleaner clip.
이미지에서도 얼굴 교체를 할 수 있나요?▼
네—많은 워크플로우가 영상과 이미지 교체를 모두 지원합니다. 가장 간단한 경우부터 시작하세요.
What’s the best aspect ratio?▼
소스 영상과 동일한 비율을 사용하세요 (세로 콘텐츠용 9:16).
생성할 준비가 되셨나요?
도구를 열고 위의 프롬프트/설정을 재사용하세요.