Zurück zu allen Anleitungen
2026-01-12
Wie man KI-Videos aus Fotos erstellt
Bild-zu-Video ist der schnellste Weg, wenn Sie bereits ein Foto haben. Verwenden Sie ein klares Bild, halten Sie die Bewegung einfach und passen Sie das Seitenverhältnis an Ihre Zielplattform an.
Schnelle Schritte
Eine schnelle Checkliste, die Sie in weniger als einer Minute befolgen können.
- 1Öffnen Sie das Bild-zu-Video-Tool.
- 2Laden Sie ein klares Foto hoch (ein Gesicht, gute Beleuchtung, einfacher Hintergrund).
- 3Fügen Sie einen kurzen Bewegungsprompt hinzu (Blinzeln, Lächeln, kleine Kopfdrehung).
- 4Wählen Sie das Seitenverhältnis (9:16 für Shorts) und kurze Dauer (beginnen Sie mit 5s).
- 5Generieren, dann Zuschnitt/Beleuchtung verbessern, wenn die Ergebnisse wackeln.
Verfügbare Tool-Optionen
Modi:StandardPro
Seitenverhältnis:16:99:16
Dauer:5s10s4s / 6s / 8s (Audio mode)
Auflösung:720p1080p
- Die stumme Version konzentriert sich auf Bildbewegung. Die Audio-Version fügt Ton hinzu (Optionen unterschiedlich).
Tutorial-Beispiele (mit Prompts & Einstellungen)
Jedes Beispiel unten ist für diesen Leitfaden vorausgewählt (nicht zufällig).
Beispiel 1
Story-Bewegung (Foto → Video + Prompt)
Image-to-Videoimage-to-video
So verwenden Sie dieses Beispiel
- 1.Öffnen Sie das Tool.
- 2.Modus wählen: Image-to-Video.
- 3.Laden Sie die unten gezeigte Eingabe hoch.
- 4.Verwenden Sie die Schlüsselwörter (oder den vollständigen Prompt) und wählen Sie die Einstellungen.
- 5.Generieren und bei Bedarf iterieren (Zuschnitt/Beleuchtung/Prompt).
Eingaben
.webp)
Image
Prompt-Schlüsselwörter
In the picturea child and a bird are playing happilyThe bird flies onto the child's handand the child reaches out to catch itlaughing joyfully
Vollständigen Prompt anzeigen (kopieren)
In the picture, a child and a bird are playing happily. The bird flies onto the child's hand, and the child reaches out to catch it, laughing joyfully.
Einstellungen (in diesem Beispiel verwendet)
Beispiel 2
Einzelbild-Animation (Foto → Video)
Image-to-Videoimage-to-video
So verwenden Sie dieses Beispiel
- 1.Öffnen Sie das Tool.
- 2.Modus wählen: Image-to-Video.
- 3.Laden Sie die unten gezeigte Eingabe hoch.
- 4.Verwenden Sie die Schlüsselwörter (oder den vollständigen Prompt) und wählen Sie die Einstellungen.
- 5.Generieren und bei Bedarf iterieren (Zuschnitt/Beleuchtung/Prompt).
Eingaben
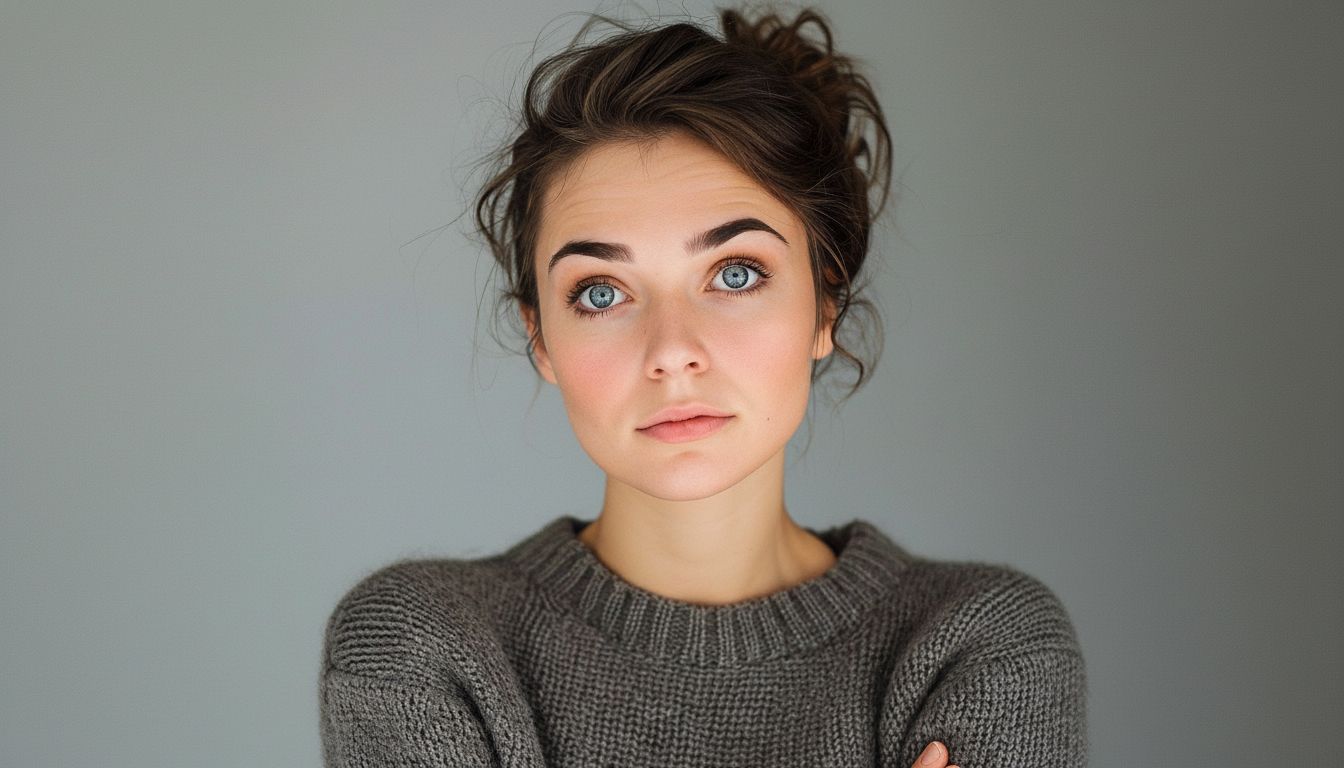
Image
Einstellungen (in diesem Beispiel verwendet)
Tipps
- Beziehen Sie Schultern ins Bild ein, um Wackeln zu reduzieren.
- Vermeiden Sie Hände, die das Gesicht bedecken, und unruhige Hintergründe.
- Verwenden Sie einfache Bewegungsprompts—komplexe Choreografie erhöht Artefakte.
FAQ
Muss ich einen Prompt für Bild-zu-Video schreiben?▼
Oft hilft ein kurzer Bewegungsprompt, aber auch ohne können Sie einfache Bewegung aus einem starken Foto generieren.
Warum sieht das Ergebnis wackelig aus?▼
Es kommt normalerweise von qualitativ minderwertigen Eingaben oder engen Zuschnitten. Verwenden Sie ein klareres Foto und beziehen Sie Schultern ein.
Welches Seitenverhältnis sollte ich verwenden?▼
Use 9:16 for Shorts/TikTok. Match your target platform to avoid re-cropping later.
Bereit zum Generieren?
Öffnen Sie das Tool und verwenden Sie die obigen Prompts/Einstellungen wieder.