How to Make a Baby Podcast Video
The Baby Podcast tool animates a baby portrait to match your audio. Add a photo, upload or record a short voice clip, then choose the resolution and review the credits before generating.
Build a short episode around one clear idea. Prepare the voice first, choose a portrait with a visible mouth, then animate that portrait to the recording. A microphone in the picture sets the scene; the uploaded audio supplies the actual voice.
Open the toolQuick Steps
Follow the steps from preparing your inputs to checking the result.
- 1Open the AI Baby Podcast tool.
- 2Upload a clear baby photo (front-facing works best).
- 3Upload an audio file or record your voice in the editor.
- 4Choose 720p or 1080p and review the credit estimate for your audio duration.
- 5Generate and play the result to check the voice and mouth movement.
- 6Download the clip. Add captions in your video editor if needed.
- A photo and audio are required. Duration comes from the recording; review the credit estimate before generating.
Turn an idea into a short recording
Use a setup, one thought and a closing line. Read the script aloud and time the recording instead of guessing duration from the number of words.
A tiny host monologue
Welcome to the tiny podcast. Today’s question: why do socks disappear? I put two on this morning. Now I have one sock and a very suspicious teddy bear.
Record this as one voice. Pause after the question and before the final line. The example is a script to record, not text you can paste into this audio-only editor.
A family milestone recap
This week I learned to crawl across the room. Everyone cheered. I was just trying to reach my favorite toy.
Keep the pace conversational. Record a clean ending rather than cutting immediately after the final word. You can use the same structure for a different milestone.
Prepare a host photo and clean voice track
- Keep the mouth visible
- Choose one face, even lighting and a near-front view. Place a pretend studio microphone beside or below the face, not across the lips. Leave room around the head for small movements and around the frame for later captions.
- Record or upload the voice
- Record in a quiet room, with one speaker and a steady distance from the microphone. Listen for clipped words, room echo, music and long silences before generating. Prepare an external voice recording first if you need a voice other than your own; this editor has no text-to-speech or voice selector.
- Check the input limits
- The current podcast workflow uses Kling Avatar, with audio up to 60 seconds and 20 MB. The file picker accepts MP3, WAV, M4A, AAC and OGG among audio files. If the browser cannot detect the duration, re-export a standard audio file before retrying.
- Choose resolution and framing
- Choose 720p or 1080p and review the estimate after the audio duration is detected. Prepare the photo in the composition you want: this editor has no separate aspect-ratio selector. Trim the audio before upload if the test should be shorter.
Tutorial Examples (with prompts & settings)
Compare the examples, their available inputs and the settings recorded with them.
Talking baby podcast clip (example 1)
Compare the portrait with the finished podcast clip. These archived examples do not include the original audio file; upload or record your own speech to try the workflow.
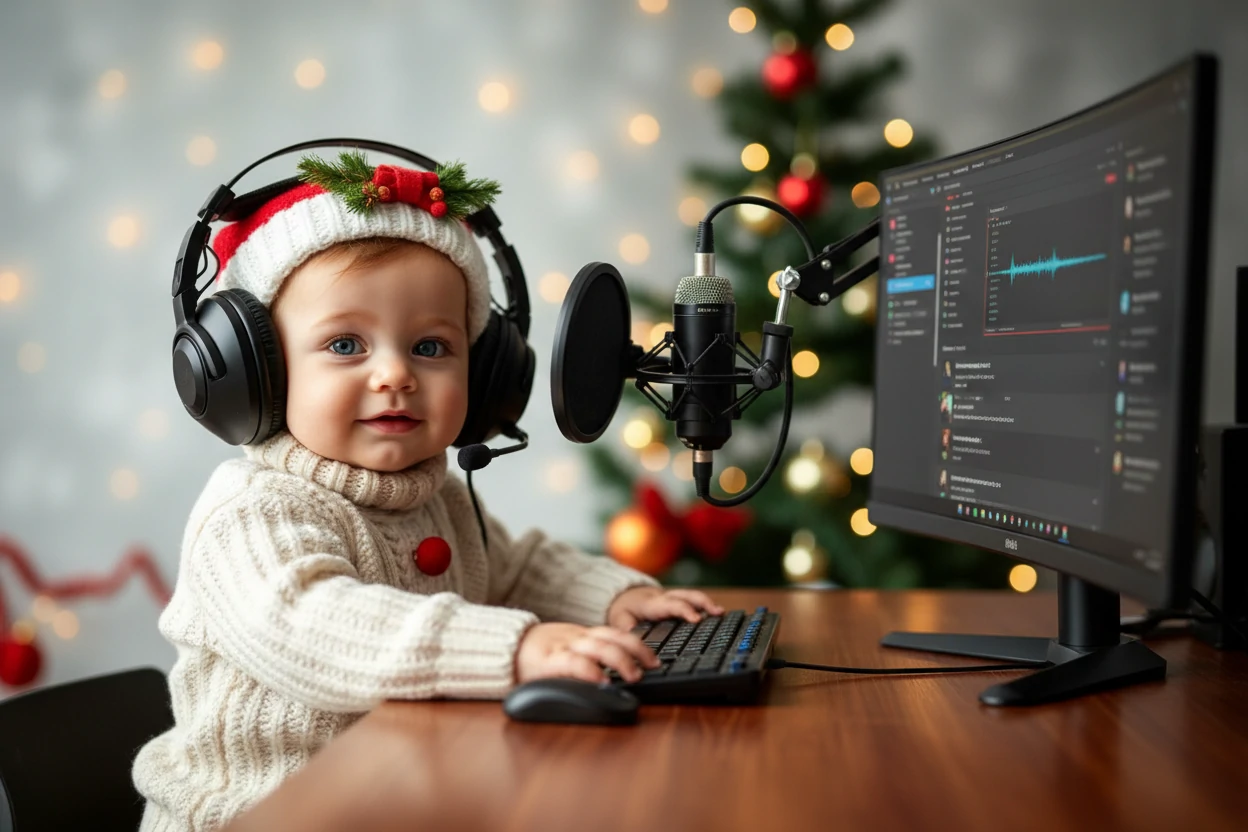
- Host setup to study
- The source shows a baby in a cream knit outfit with headphones at a desk. The microphone sits to the side of the face. Compare the head and mouth movement with the still image, and check whether the headphones and microphone remain stable.
- What the archive contains
- The output is 720 × 480 and about 27.6 seconds. The original audio and model settings are unavailable, so this is a framing and animation example, not a reproducible voice preset or evidence of the current output resolution.
Talking baby podcast clip (example 2)
Compare the portrait with the finished podcast clip. These archived examples do not include the original audio file; upload or record your own speech to try the workflow.
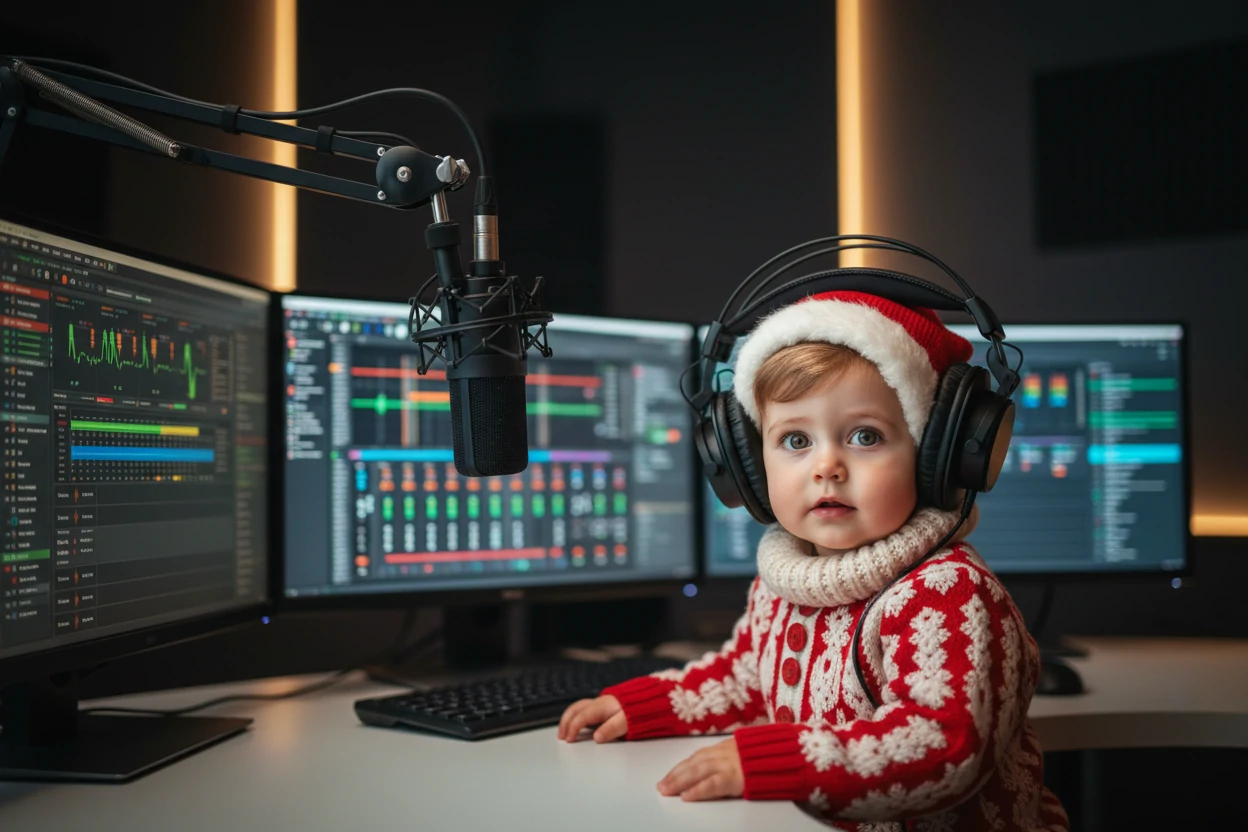
- A wider studio composition
- This source places a baby in a red outfit beside a suspended microphone and several screens. The face occupies less of the image. Compare it with the first example when deciding how much studio scenery to keep in a phone-sized clip.
- Check the full performance
- The archived file is 720 × 480 and about 28.9 seconds. Inspect the lips, headset edges and face through the ending. Without the original audio, the exact voice or timing cannot be recreated from the photo alone.
Make a two-speaker episode from separate clips
The current tool animates one photo with one audio file per generation. It does not assign different voices to two faces in a group photo.
- Split the conversation into turns
- Prepare a separate portrait for each host and a separate audio segment for each speaking turn. Keep the frame shape and visual style similar so cuts feel consistent.
- Generate and inspect each turn
- Use only that speaker’s audio with that speaker’s portrait. Review the credit estimate for each clip. Download a usable turn before making the next one.
- Assemble the episode in a video editor
- Place the clips in dialogue order and keep the pauses natural. Add captions and background music in the editor. Check that the original clip audio is not playing twice underneath a separate full-length voice track.
Review the voice, timing and final file
- Mouth movement looks late
- Check at the first sentence and near the end. If the source has overlapping speech or loud music, prepare a cleaner single-speaker recording. If the mouth is obstructed, change the portrait. Compare one change at a time.
- The clip feels slow
- Shorten the introduction or remove a long pause from the audio before generating again. Changing a written script after recording does not change the audio already uploaded.
- The beginning or ending is cut off
- Listen to the source file by itself. Restore a clipped word in the recording before retrying. Leave a small natural pause after the closing line, then trim the finished clip in your editor if necessary.
- Check the export on a phone
- Open the downloaded file, listen at a normal volume and watch the whole clip. Add and proofread captions in an editor; verify names and punctuation manually. Keep captions away from the mouth and platform controls.
Related steps for your next clip
- Make a short talking-baby message
For a greeting or one spoken line.
- Create an AI image for the host
Prepare a fictional portrait before animating it.
Tips
- Record in a quiet place and use a steady speaking pace.
- Start with a short recording to compare results before spending more credits.
- Use a portrait that already fits your intended framing; this tool has no separate aspect-ratio selector.
- Listen to the uploaded recording before generating. Remove long silences and check that one speaker is clearly audible; the tool uses this recording as the voice.
FAQ
Can I type a script in the Baby Podcast tool?▼
What photo works best?▼
How does audio length affect the price?▼
Does the tool turn my voice into a baby voice?▼
Can I add automatic subtitles here?▼
Can I make an episode longer than 60 seconds?▼
Ready to generate?
Choose your own inputs and check the available settings before generating.