How to Make AI Images: Text Prompts and Photo Edits
Start with a description for a new picture, or upload a reference when you want to change an existing photo. This guide follows both workflows in the AI Image Generator, using a book-cover illustration and a product background edit as examples.
A useful AI image prompt describes a picture you can judge: what is in it, where it sits and how it should look. Start with one composition. For an edit, use the original photo and separate the requested change from the details you need to keep.
Open the toolQuick Steps
Follow the steps from preparing your inputs to checking the result.
- 1Open the AI Image Generator and choose an image model. Check that it supports reference images if you plan to edit a photo.
- 2For text-to-image, leave reference inputs empty and describe the subject, setting, style and framing. Put exact words for a title in quotation marks.
- 3For a photo edit, upload the reference and state what should change and what should stay. For example, change the background while keeping the product’s shape and color.
- 4Choose the supported aspect ratio and resolution. Review the credit total beside Generate; available controls and prices depend on the selected model.
- 5Generate, open the completed image in your creations and inspect it at full size. Compare edits with the source, then download the version you want.
A new scene or an edit to an existing photo?
- Text to image: invent the scene
- Leave reference inputs empty. Name one main subject, its surroundings, the lighting and the visual style. Choose a destination first: a portrait cover needs different space from a wide website banner.
- Photo editing: give the model a source
- Choose a model with reference-image inputs and upload a clear original. State the change first, followed by what to preserve. For a product, keep the full outline visible; a cropped handle or label leaves the model to invent missing detail.
- Size and model settings
- The default GPT Image 2.5 Flare form supports text or reference images. Open the size control to choose a supported ratio and 1K, 2K or 4K. After switching models, check the reference previews, prompt and available settings again. The displayed credit estimate belongs to the current setup.
Write the composition before adding decoration
These practice prompts adapt the two workflows below. They are new suggestions, not the exact instructions behind the archived examples.
Illustration with space for a title
A small cream rabbit in a navy coat at the bottom of a moonlit garden, tall golden flowers framing the sides, a clear dark-blue area across the upper quarter for a title. Painterly gouache, warm moonlight, vertical composition. No lettering, border or book mockup.
Choose 2:3 when available. Add the final title in a design editor if exact spelling and typography matter. This creates a flat cover illustration, not a print-ready book file.
Change only the product setting
Keep the reference bowl, two-handled cup and spoon in the same arrangement, with the same shape and colors. Replace the background with a warm cream stone surface and a softly blurred apricot wall. Gentle window light and contact shadows. Keep every handle and edge inside the frame. No extra objects or text.
Upload the source before using this request. “Keep” is an instruction to check against the result, not a guarantee that the product remains pixel-identical.
Tutorial Examples (with prompts & settings)
Compare the examples, their available inputs and the settings recorded with them.
Book cover from a text prompt
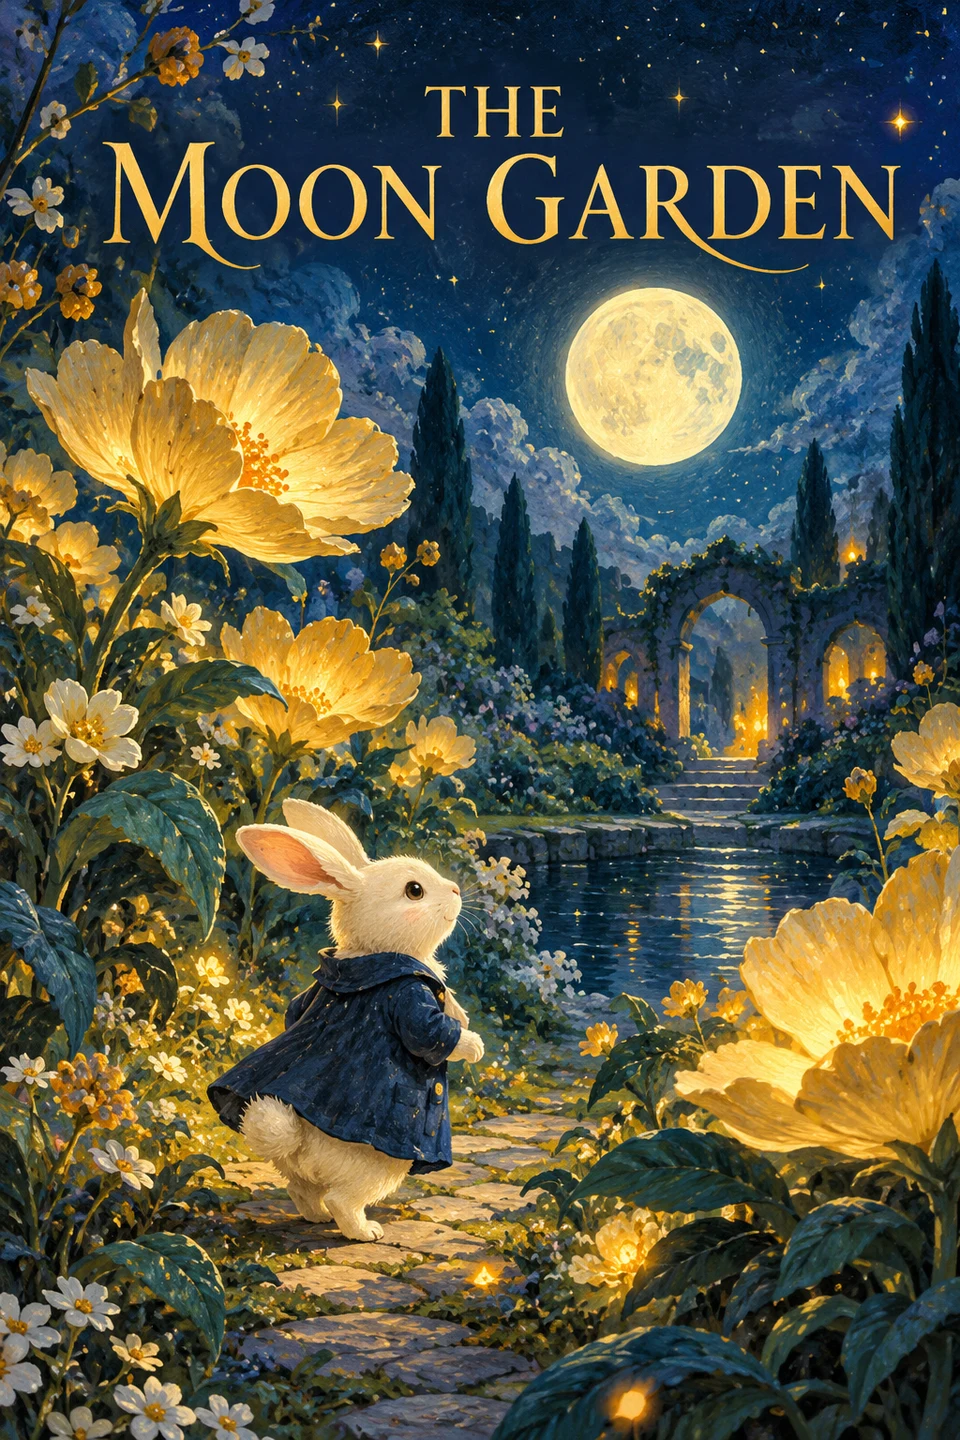
These illustrative assets were made with ChatGPT and are reused from the site’s reviewed gallery. They explain the workflow; they are not test results from a selected BabyVideo model. Try the prompt with your own model and inspect the result.
Prompt keywords
An original polished illustrated childrens book cover, a little cream rabbit in a navy coat wandering a moonlit garden of oversized golden flowers, painterly gouache, layered midnight blue and teal, warm magical light, beautiful clear composition. Exact readable title at the top: THE MOON GARDEN. No other words, no logo, no borders, no mockup, no book perspective.
- Why the cover is readable
- The rabbit sits low in the frame; flowers guide the eye toward the moon and the gold title above. Compare that hierarchy at full size and as a small thumbnail. The archived image is 960 × 1440, so its 2:3 shape does not by itself establish suitability for a particular print size.
- Adapt the wording for your audience
- The example title is English. For another language, replace the title deliberately and check accents, punctuation and line breaks. Keep a version without lettering if you plan to typeset it separately.
Product photo: original and edited background

These illustrative assets were made with ChatGPT and are reused from the site’s reviewed gallery. They explain the workflow; they are not test results from a selected BabyVideo model. Try the prompt with your own model and inspect the result.

Prompt keywords
Edit the background of this product photo. Keep the same sage-green silicone bowl, two-handled cup and cream spoon, with their exact shape, color, number, arrangement and camera angle. Place them on warm cream limestone with a softly blurred apricot kitchen wall and linen curtain behind them. Add gentle window light and natural contact shadows. Keep the entire cup spout, handles, bowl base and spoon in frame with generous margins. No added products, people, lettering or logos.
- Compare objects before admiring the light
- Use the original input beside the warm kitchen result. Count one bowl, one cup and one spoon. Inspect both cup handles, the spout, bowl base and spoon contour, then compare their color and placement. A convincing background can still hide small changes to the product.
Make the next attempt answer one question
- Too much happening
- Remove secondary objects and conflicting style words. Specify where the main subject should sit and which area should remain empty. Keep the model and size fixed while checking the revised composition.
- The edit changes the subject
- Return to the original source rather than repeatedly editing a distorted result. Narrow the request to one change and name the details to preserve. If an exact logo or product contour is essential, finish it in a conventional editor.
- The text or crop is wrong
- Add final lettering separately when repeated spelling attempts fail. For a crop problem, choose the destination ratio and request margins around the subject. Higher resolution adds pixels; it does not automatically fix composition or wording.
Keep the image, source and useful settings together
Open the completed image from your creations and inspect it at full size before downloading. Save the source, prompt, model and size alongside the version you choose. Compare the actual file dimensions with your intended placement; a PNG extension alone does not mean a transparent background.
For a series, keep the same source, palette and prompt structure while changing one scene detail. Judge the set together because a reference image does not lock identity perfectly. When the still image is ready, use it as the starting frame for a separate video generation.
- Turn the finished image into a short video
Describe movement separately from the still-image composition.
- Use a guided baby cartoon workflow
Choose a photo and a focused cartoon style.
Tips
- Check every letter in generated text. If spelling matters, leave space in the image and add the final wording in a design editor.
- For product edits, compare logos, buttons, handles and proportions with the source. A background instruction does not guarantee that every product detail stays unchanged.
FAQ
Do I need a photo to generate an image?▼
Why are some settings missing?▼
What should I put in an AI image prompt?▼
Can I change a background without altering the product?▼
Should I write every prompt in English?▼
Ready to generate?
Choose your own inputs and check the available settings before generating.